快速上手
如未安装 Whistle,请先参考 README 安装:https://github.com/avwo/whistle#readme
安装成功后,打开 Whistle 管理界面 http://local.whistlejs.com :
界面操作

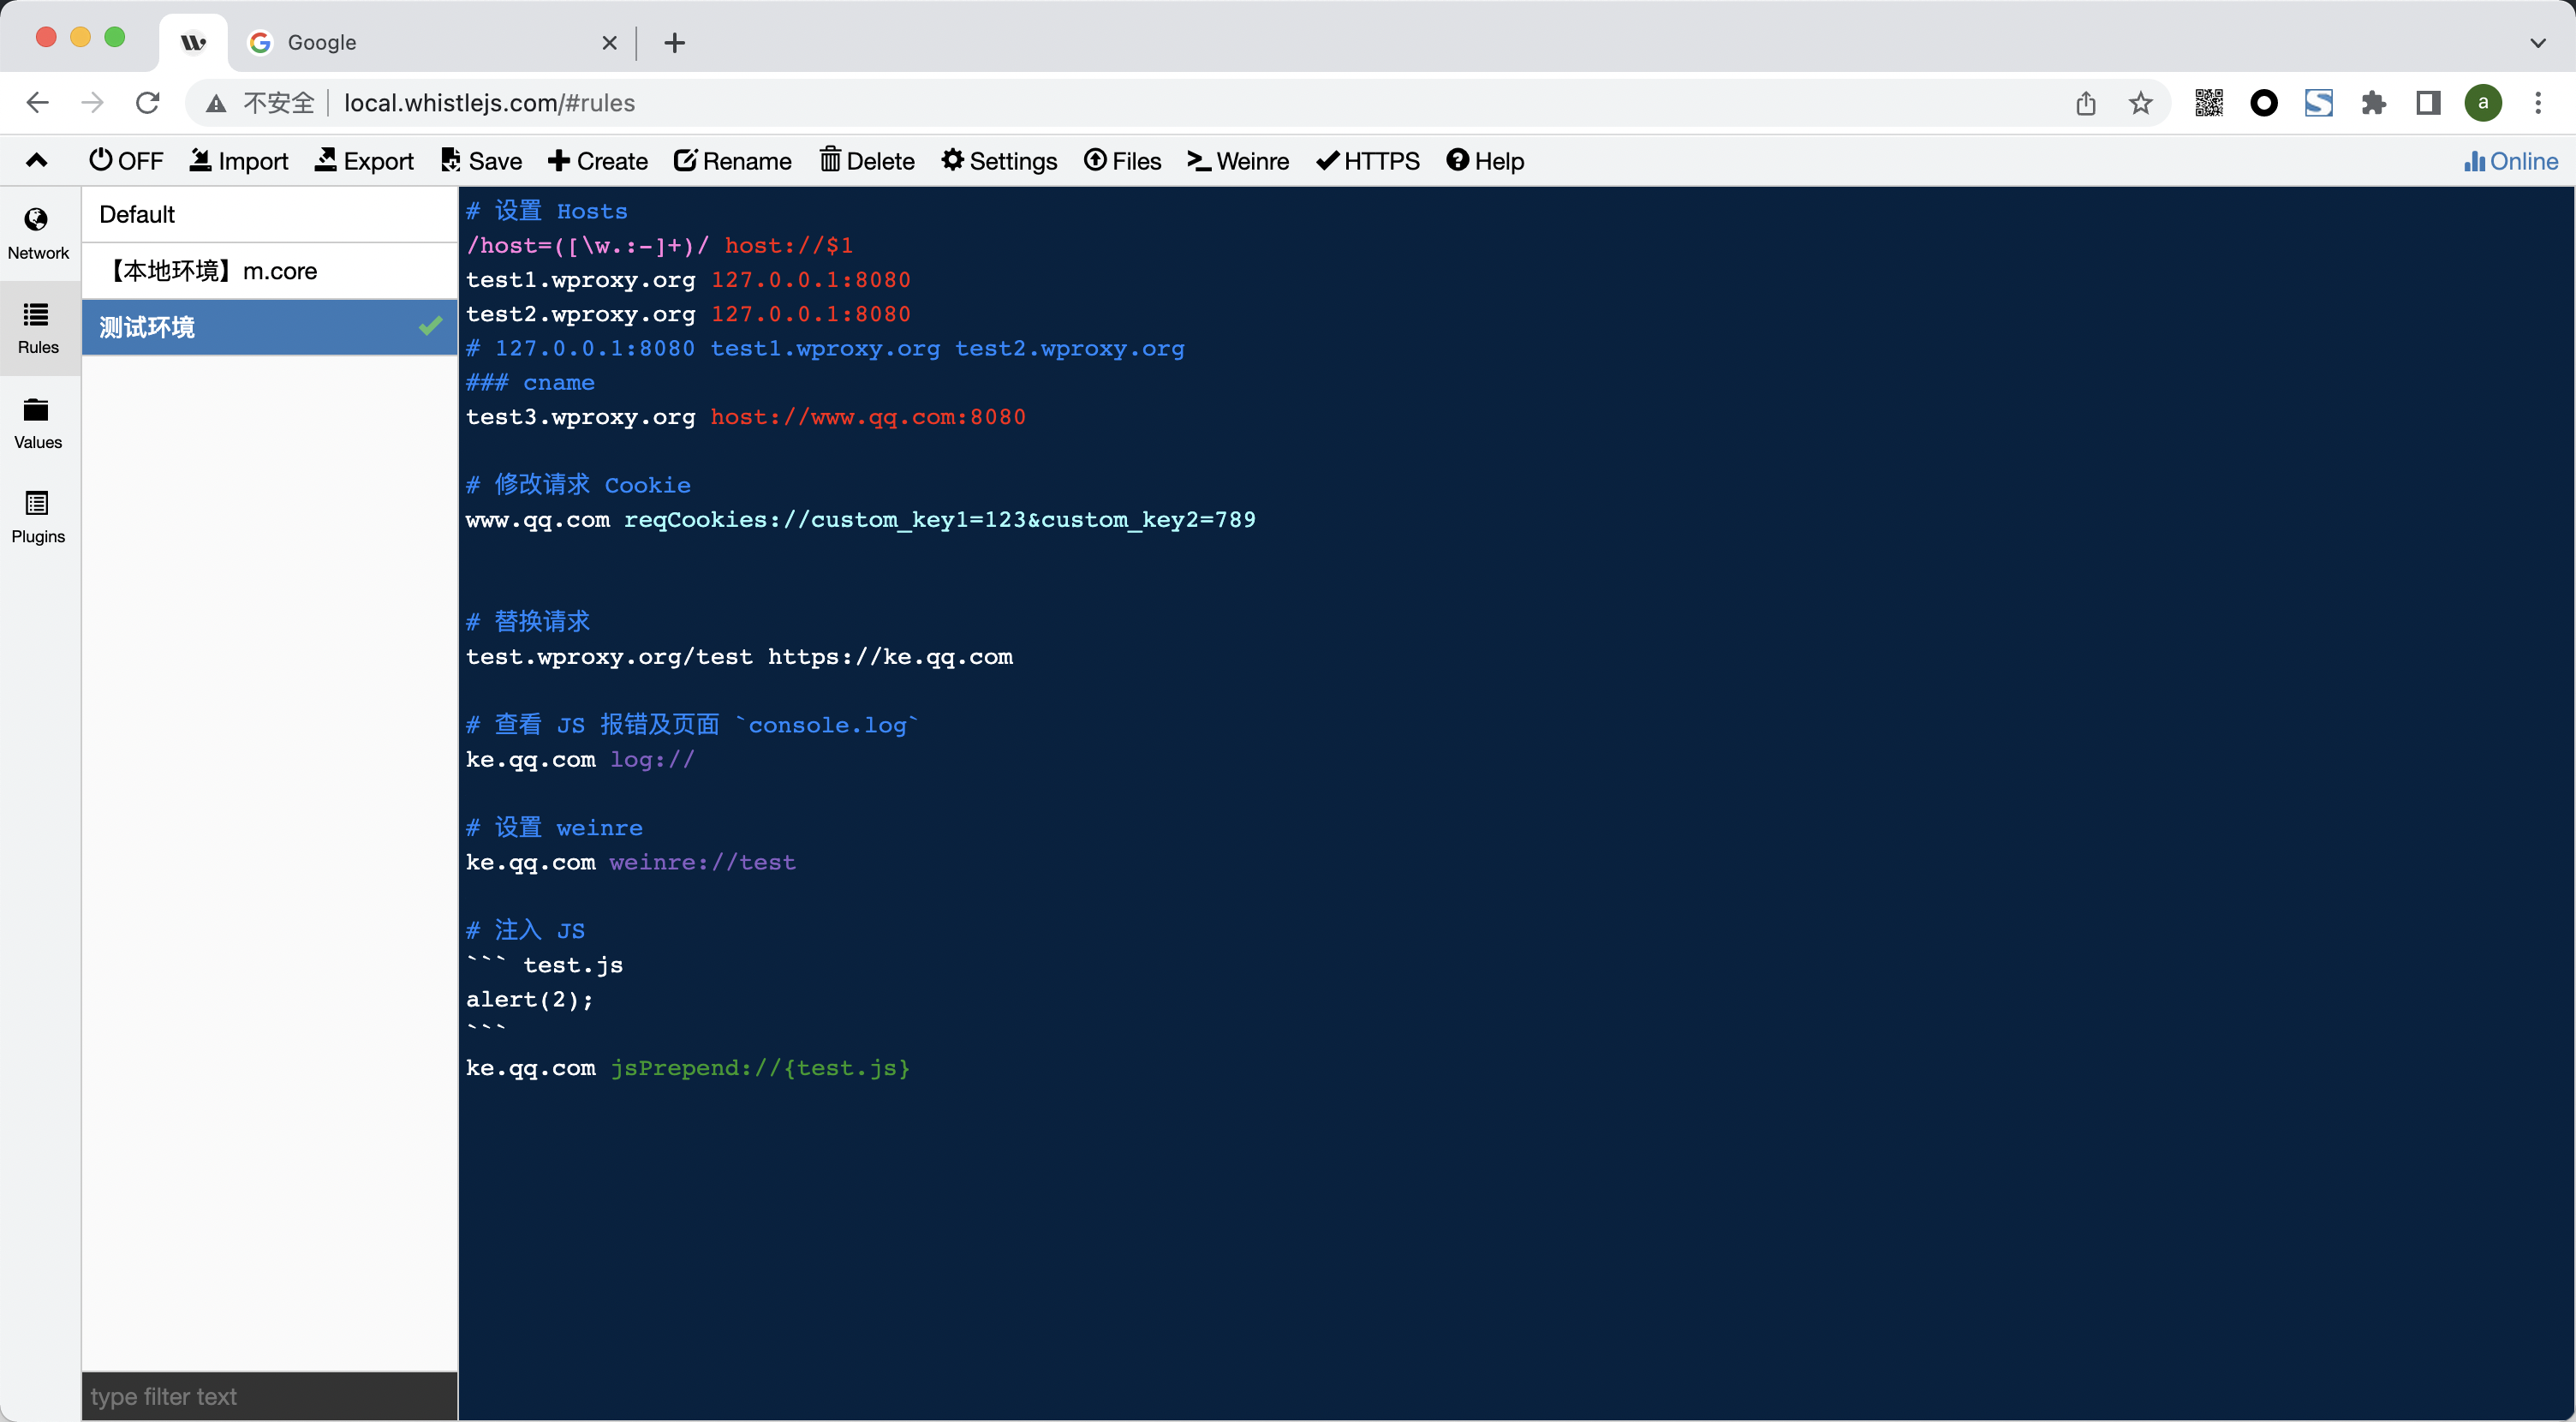
切到 Rules 并点击 Create 新建一个 测试环境 接下来看下如何通过设置规则操作请求。
设置 Hosts
普通的 Hosts 配置:
 test1.wproxy.org 127.0.0.1
 test2.wproxy.org 127.0.0.1

 # 或

 127.0.0.1 test1.wproxy.org test2.wproxy.org
也支持带端口,匹配路径、协议、正则、通配符等:
test1.wproxy.org/path/to 127.0.0.1:6001 https://test2.wproxy.org/path1/to1 127.0.0.1:6001 # 根据请求参数设置 host /google/ 127.0.0.1:6001 # 或 127.0.0.1:6001 test1.wproxy.org/path/to https://test2.wproxy.org/path1/to1 /google/- 支持 cname:
test1.wproxy.org/path/to host://www.qq.com:8080 支持通过请求参数设置 Hosts:
/host=([\w.:-]+)/ host://$1


修改请求 Cookie
www.qq.com reqCookies://custom_key1=123&custom_key2=789

请求替换
- 替换本地内容
test.wproxy.org/test file:///Users/xx/staticstest.wproxy.org/test及其子路径test.wproxy.org/test/path/to请求 会尝试读取本地文件/Users/xx/statics/path/to 替换其它请求
test.wproxy.org/test https://ke.qq.comtest.wproxy.org/test及其子路径test.wproxy.org/test/xxx请求会用https://ke.qq.com/xxx响应头和内容替换

查看 JS 报错及页面 console.log
ke.qq.com log://

修改响应状态码
# 模拟响应 500(请求不会到后台服务)
test3.wproxy.org/path/to statusCode://500

# 修改响应状态码(请求会到后台服务)
test4.wproxy.org/path/to replaceStatus://400

# 302 重定向
test5.wproxy.org/path redirect://https://ke.qq.com/

# 301 重定向
test6.wproxy.org/path redirect://https://ke.qq.com/ replaceStatus://301

手机设置代理
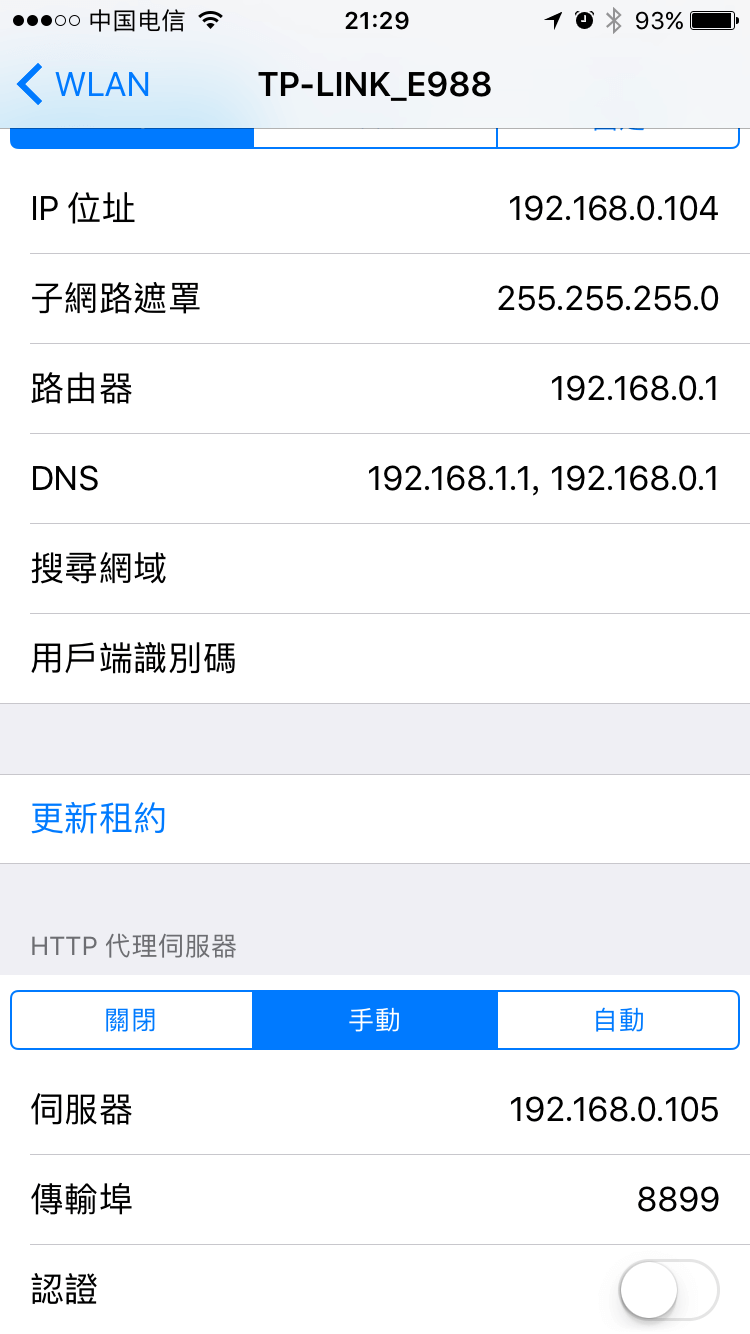
iOS
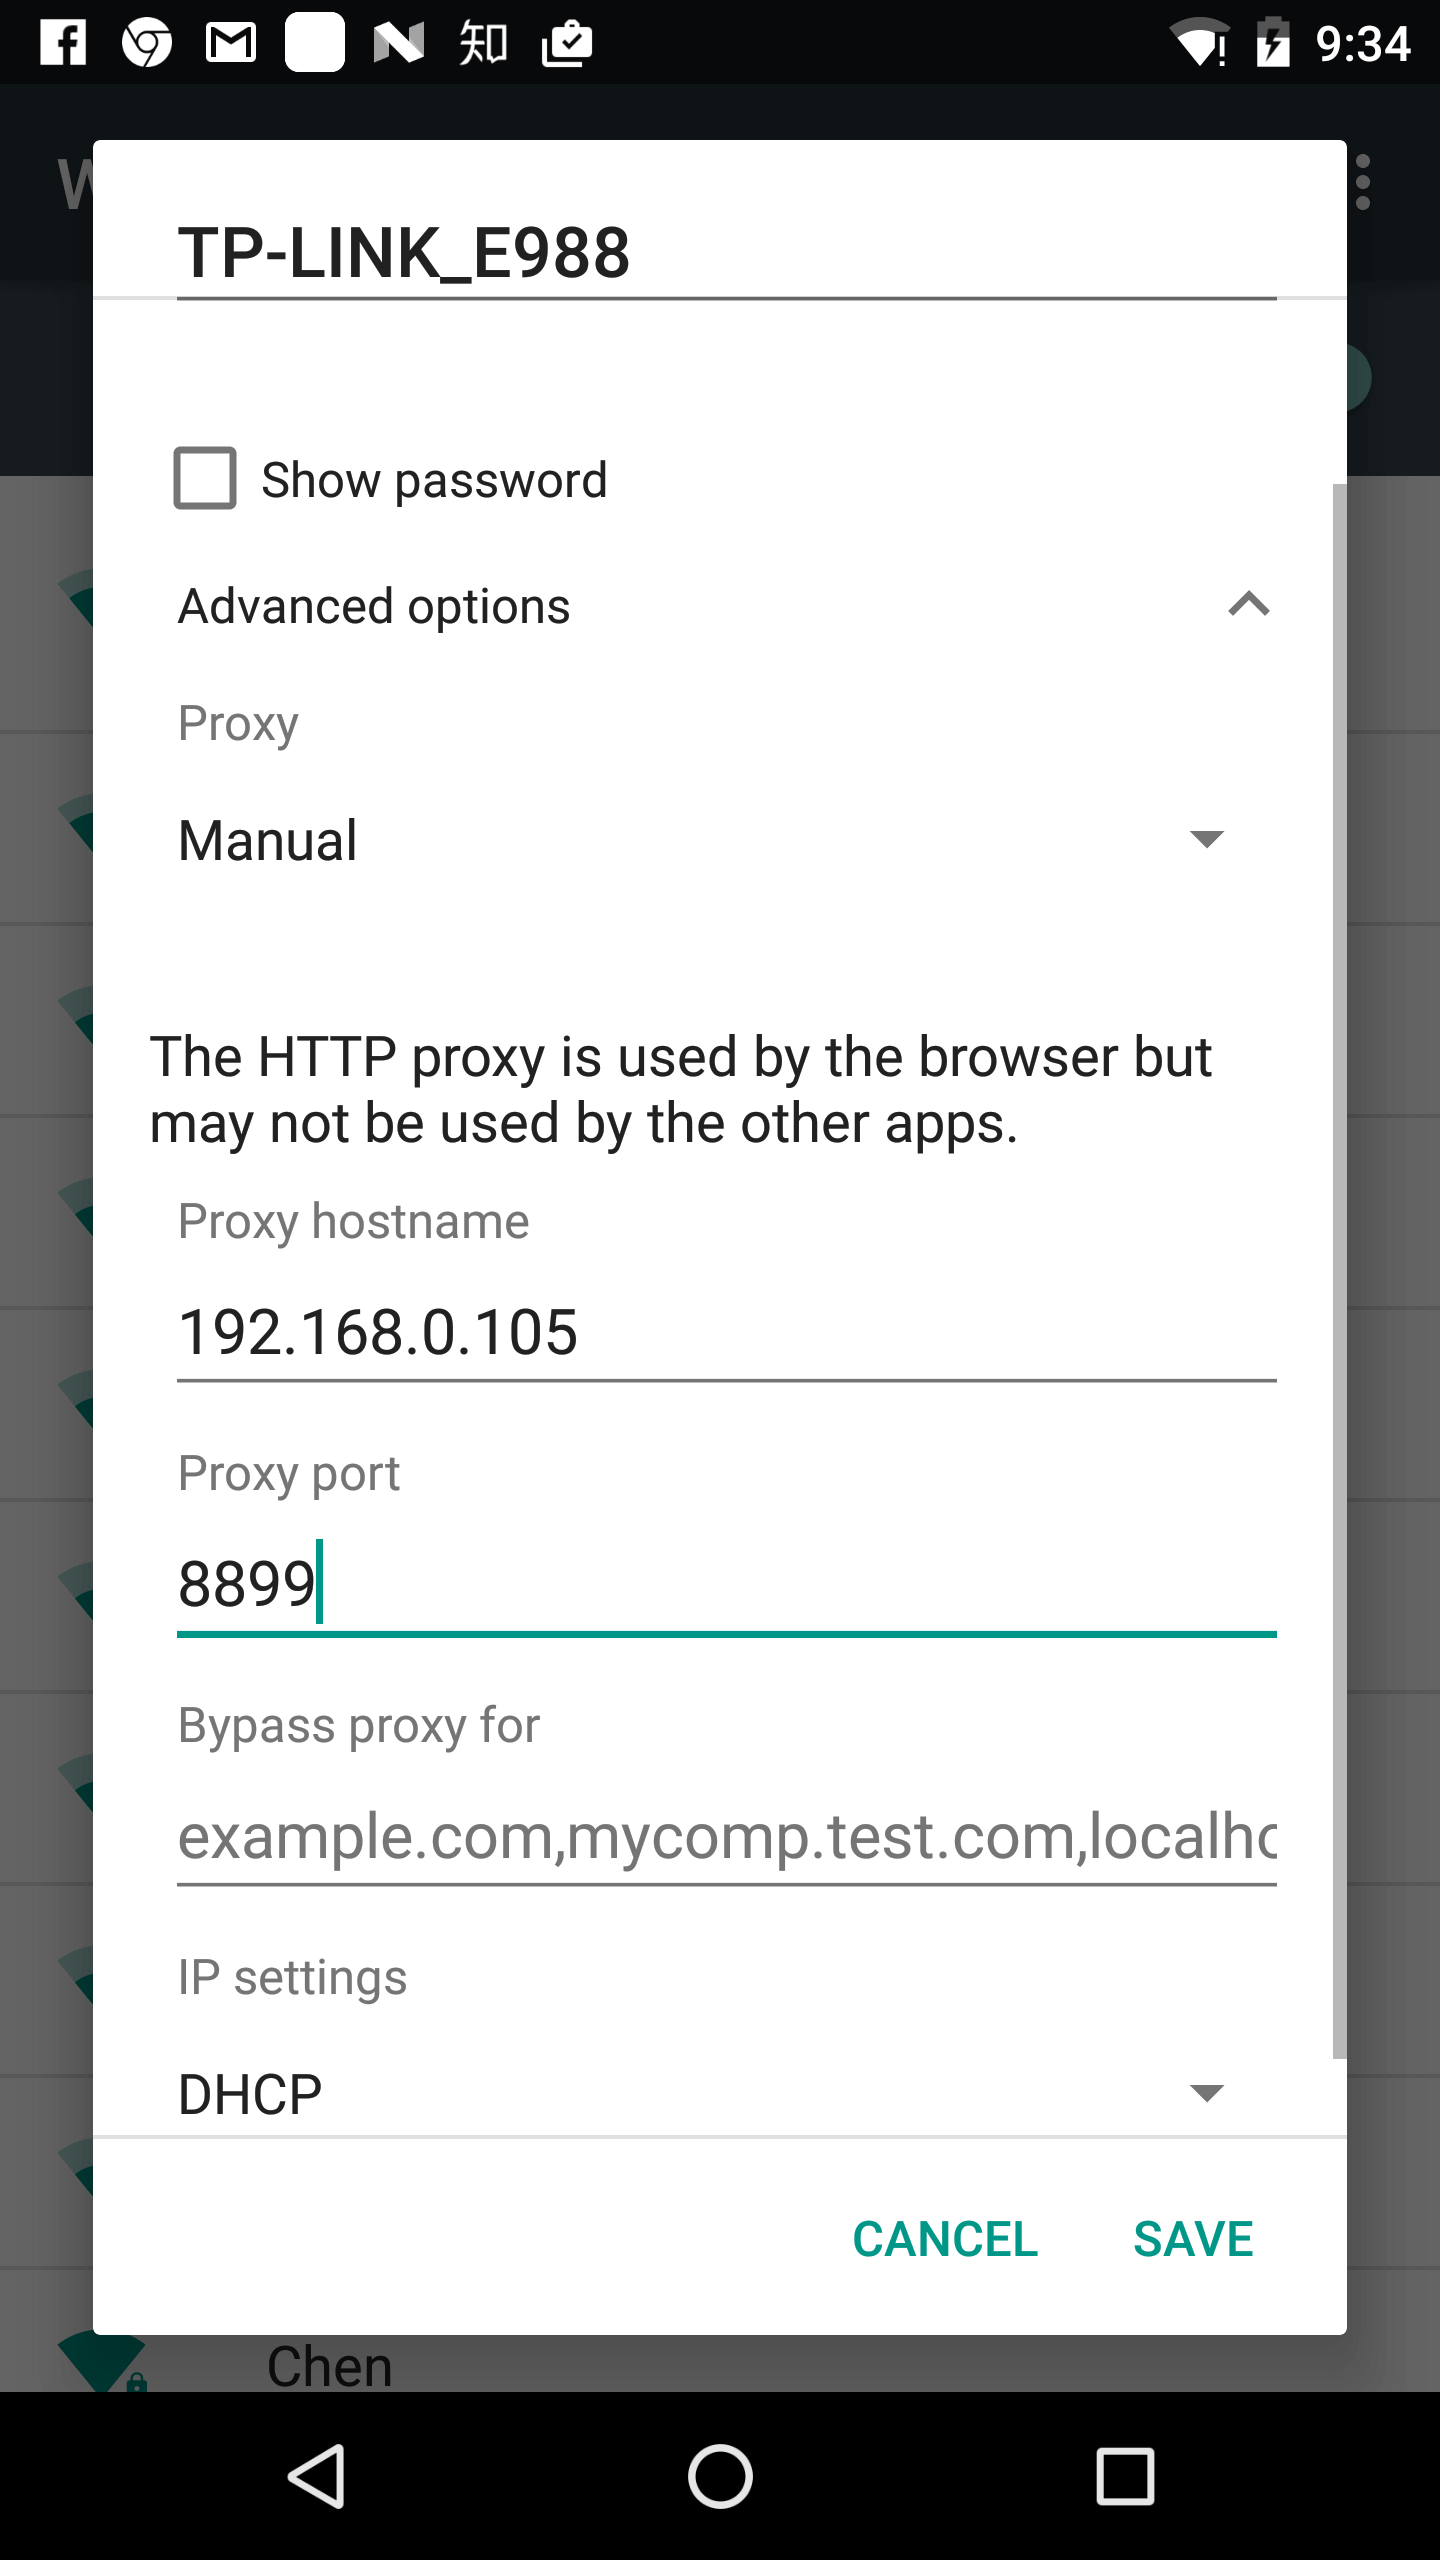
Android
更多功能请参考:协议列表